Users for both office and POS can be managed under “Personnel” and “Users”.
1 – Button to add a new user
2 – Active salepoints/stores for the user can be seen when hovering on
3 – Button to edit an existing user
4 – Filter to show deactivated users or filter by active salepoint
5 – Option to edit the layout of the user list
6 – Search to find users by name

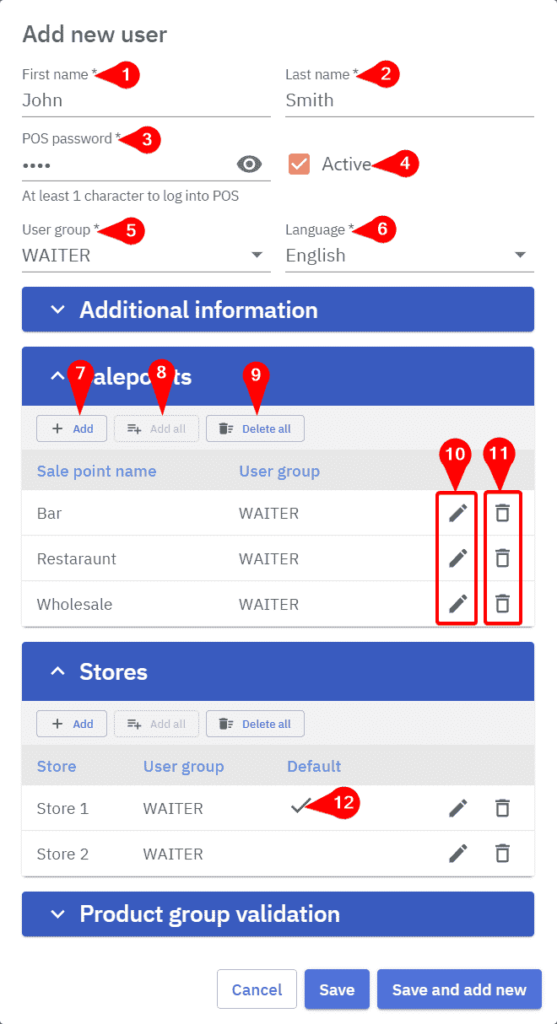
Adding a new user
1 – First name, will be printed on the invoice
2 – Last name, will be printed on the invoice
3 – POS password, used to log into the POS, it’s recommended to use only numbers
4 – Active toggle, when inactive users will be unable to use the program
5 – User group will specify which actions the user will be able to perform
6 – Selects in which language will the programs be displayed for the user
7 – Option to add a salepoint
8 – Option to add all salepoints
9 – Option to delete all salepoints from user
10 – Button to edit the user group in a selected sale point
11 – Button to remove a salepoint for the user
12 – Default store, determines which store will be automatically selected when the user logs in

When creating a POS user it should be made sure that the user has the salepoint the POS is under, added to the user, otherwise logging in will display an error message.