When there are two or more stores available Transfer documents can be used to move product quantities between stores.
Creating a transfer document
Transfer documents can be created under “Transfers” > “New document”.

1 – Document name should be unique, can also include letters
2 – Document date is to specify at which date did the transfer take place
3 – Store from is the store where the products will be subtracted from
4 – Store to is the store where the products will be added to
5 – Quantity of product being moved
6 – Search field to add products to the transfer document
7 – Save button for saving changes, a document has to be saved before it can be accepted
8 – Accept button locks the document for changes and moves the products between stores, this action cannot be undone
9 – Option to close the document
10 – Additional options to create a copy, print or delete the document, deleting is available only when the document is not accepted

Reverting a transfer document
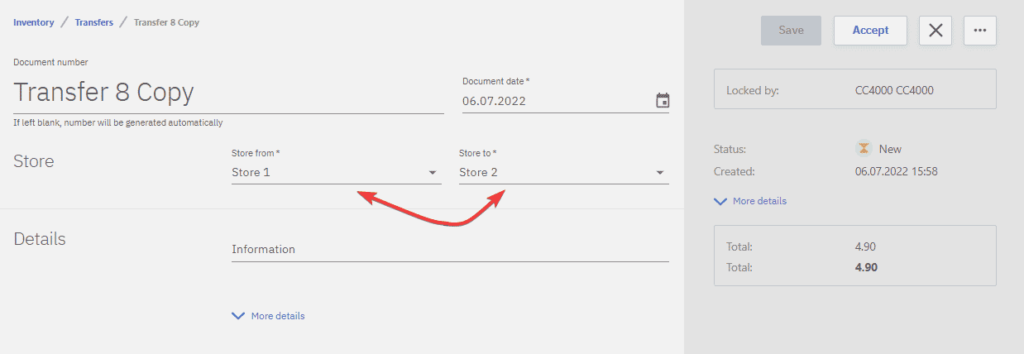
To revert a transfer document first a copy of the original document has to be created.
Then by switching the store from and store to a reverse transfer document is created, which after accepting will revert changes made to the stores by the previous transfer document.
